Pull Data to Current Return:
The top portion of the Pull Data to Current Return screen displays the specifics of the items that will be pulled forward. This is a good opportunity to check through what the taxpayer has provided to see if they have forgotten something. For example: If you have three W-2s listed (as I do below) and the taxpayer has only provided you with two W-2s, this is a good opportunity to ask about the third. If they no longer have a W-2 from that employer, simply remove the checkbox.
Note: Being prompted to Pull Data to Current return only occurs one time when you initially create the return.

Selecting to Pull Data to the return
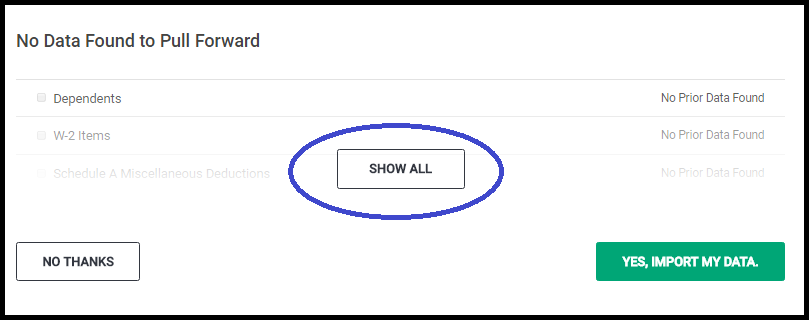
The bottom half of the screen, displays the items that have no data to pull forward. You have the opportunity to do three things at this point:
- Show All — expands the listing of data that does not carry forward (this example is from a different return than the screenshot above that did not have dependents or W-2s)
- No Thanks – Will start a blank return
- Yes, Import my Data — Will import that data for the items selected
Selecting Yes, Import My Data will land you on the Filing Status Page
The Filing Status of the prior year return will be selected. You have the opportunity at this point to make changes. In the screenshot below my prior year return was MFJ. Click Continue to review the Taxpayer/Spouse demographic information and make any corrective changes.

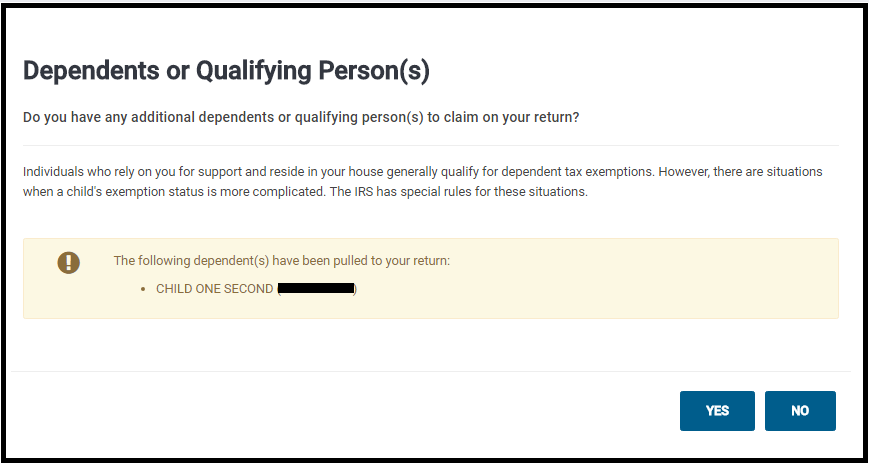
Dependents or Qualifying Person(s) screen.
This screen will display the dependents that were selected in the dependent section. If you have additional dependents or want to make modifications select Yes, otherwise, selecting no will take you to the Federal Section.
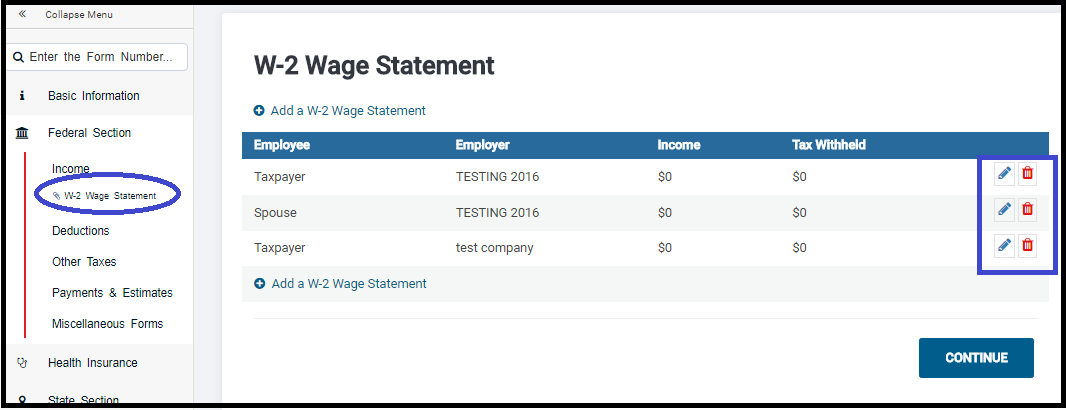
Example of pulling forward the W-2 Information.
This example has three W-2s selected to pull forward. Note: Removing the check will prevent the information from pulling forward.

This is what your screen will look like after pulling the data forward. At this point, you can edit the income document and enter the current year income information. Note: If you changed the address in the Personal Information Section, you will also need to change it on the income document you pulled forward. Notice it loaded the W-2 Wage Statement as part of the Forms Completed feature. Simply click on it to manage the W-2s.
Blog Posted 01/16/2017 7:54 am eastern