Category: What’s New

Product Update Alert: Thursday, May 3rd at 5:00am ET

02 May 18
Craig Smith
No Comments

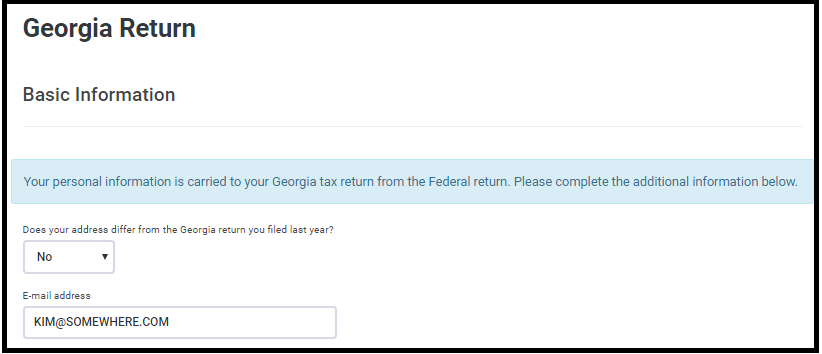
The site will be placed in maintenance on Thursday, May 3rd at 5:00am ET to release some updates.

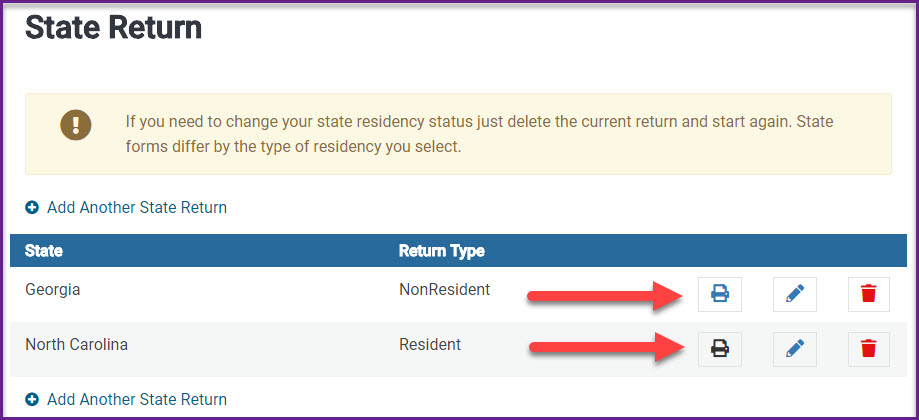
  • State PDF View – Details can be found on this blog post here
  • 1040 View Entry Method Update – This update, when utilizing the “1040 View” for return preparation, will return the user back to the 1040 View instead of the regular menu such as Income, Adjustments, Itemized Deductions, etc. This update eliminates the current requirement of the user to return to “Summary/Print” to then click on the next line entry needed.
    • When clicking Line 7 for Wages and Salaries, the user will be directed to the W-2 entry screen as current functionality dictates. After adding the W-2(s), when clicking “Continue” on the W-2 grid screen, instead of being taken to the main Income menu, you will be returned to Summary/Print (1040 View) to click on the next line item for the return being prepared.
  • W-2G – Addition of a “Gambling Losses” field under the gambling winnings field where the loss entry will automatically carry to the Schedule A.
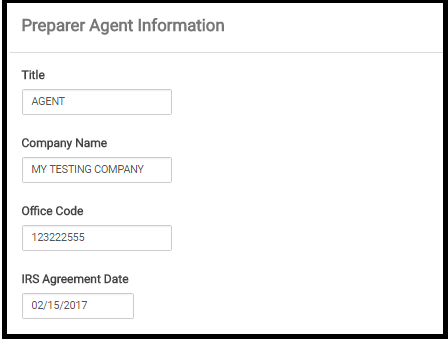
    • Click here for additional details
  • IL – Remove the “$” sign within the allocation entry field for dependents to reduce confusion as to the value being requested (Issue #1975)
  • ME – Remove a hard-coded “X” on the PDF on Schedule 1, Line D (Issue #1981)
  • CT – Correct a calculation issue on MFS CT returns when it is indicated the Spouse lived with the Taxpayer at any point during the year and Social Security Benefits have been reported (Issue #1895)
  • LA – Correct a validation error occurring as a result of the “Partnership” name not carrying to the PDF (Issue #1964)
  • MN – Correct a PDF display issue for the M1REF line 1a is blank when a value is expected (Issue #1995)

State PDF View! (LIVE 5/3/18)

02 May 18
Craig Smith
,
No Comments

Scheduled to be released live on 5/3/2018!

We wanted to provide an early look at a new enhancement coming soon – State PDF View! After completing a state return from the State Section, you will soon see a printer icon (shown below) on the state return grid. Clicking the printer icon next to a state return will open a new window to display the PDF of only that state.

Pro Online: New – Report Customization

01 May 18
Craig Smith
, ,
No Comments

The “Report Customization” menu within “Configuration” is an enhancement released today. This menu option (shown below) is available at the site level for users that have access to the configuration menu with the corresponding “Security Role” assigned to their security template.

Note: Site admins can now access their sites and add the below security role to existing security templates for applicable users – “Edit and Customize Reporting Display


What is Report Customization?

Having access to this menu provides the ability to edit what reports are visible within the “Reports menu” and what order they are displayed in. This enhancement allows site admins to further configure their own site to be more effective/efficient based on the reports available to other users. You can now limit the displayed reports to only the ones utilized at your site.

What does it look like?

The initial view when first accessing this menu will only display the current reports visible within your “Reports menu“.

  • Select the “X” located on the right side of each displayed report to remove that report from being accessible/visible within the reports menu.
  • To add reports, simply start typing inside the “Report Type (Lookup)” field. Applicable results will filter automatically.
    • For example, type “reports”, “IRS”, “Management”, etc. and all reports will filter accordingly.
    • To add a report to the reports list, click on the report name that appears in the filtered results.


To view all available reports that can be added, click inside the “Report Type (Lookup)” field and then press the down arrow on your keyboard. This will display the full list of available reports allowing you to choose which reports to add to your list. After adding the wanted reports to your site, you can drag and drop each report to sort the order in which they are displayed. The “Drag and Drop” sorting method works just like Custom Questions when changing the order of answers.


A couple items to note with this update:

  • The Configuration menu is now in alphabetical order based on name of sub-menus
  • Report Customization” is available only at the site level and not at the Group level

Suggestion of the Day: Report Management

26 Apr 18
Kim Manuel
, ,
No Comments

Suggestion from Volunteer

Would like ability to arrange Reports Categories in the order that I use them. I use “Transmissions”, then make a PDF in “Returns Transmitted”. Later I check “IRS Acknowledgements” and make a PDF copy. Scrolling through the list to get to Returns Transmitted is annoying. Putting it after IRS acknowledgements would be helpful. Or, giving us the ability to customize the list would be nice.

TaxSlayer Recommendation

Proposal:  Allow the site administrator to manage the reports that are available for use under the Reports tab and in what order they are displayed.

Tracking ID 269580

Status:  Committed

Implementation Plans

This feature will be available at the site level only.

We will be adding an option to Security Templates that allow the site administrator to enable the ability to edit the report listing.

The user that has the option enabled will be able to limit the reports that are displayed under Reports on the Welcome page.  They can also order the reports to better fit the workflow of their sites.

This is scheduled to be delivered the week of April 30th.

Pro Online 2017: Loading Basic State Information in Basic Information

29 Mar 18
Kim Manuel
, ,
No Comments

We have turned on the feature that allows you to enter the basic state information that is required for your specific state after you complete the Taxpayer’s personal information.

Note:  This will appear on new returns and returns where the state is not already completed as a resident state

Step 1:

Select the Taxpayer’s resident state.  Note:  If this is not selected the state page will not display and the state will not automatically calculate until you add it in the state section.

Step 2:

Click continue after completing the Personal information page.  If the resident state is not loaded on an existing return or if this is a new return, the state basic page will load

In this example of GA, I can answer the address question and enter an email address:  Note that [email protected] is a format template letting the user know the required format of the field.

Step 3 (optional)

Verify the information flowed to the state return.  The purpose of this field is that if no additional changes are needed for the state, you can enter the data at this point rather than editing the state in the state section.

This is an example of answering “No” to the address question and entering [email protected] as an email address.

Example of NC Basic page in Personal Informatio

Blog Posted 03/29/2018

Pro Online 2017: New: Customer Retention Report

09 Mar 18
Kim Manuel
,
No Comments

Purpose:  Allows you to quickly view the returns that were prepared at the site in the prior year during a specific time period that have not been prepared during the current year.

Benefit: Helps in planning and helps understand taxpayer retention patterns.

How do I use the report?

(1) Navigate to the Reports menu and click Select on Client Retention Report

(2) Select the EFIN and PRIOR year date range

(3) Click Continue.  The report will generate a list of clients that had returns prepared during that time period that have not had their returns prepared for the current year.

Pro Online 2017: Acceptance Agent for W-7 — Complete

07 Mar 18
Kim Manuel
,
No Comments

We released Phase I on Friday, March 2nd of having the ability to print the Certified Acceptance Agent information on the bottom of Form W-7 when applying for or renewing ITIN applications.

Navigate to the Preparer(s) menu in configuration

Edit an existing Preparer or Create a new one

There is a new section located between the Personal Information Section and Login Account Section

This is where you enter the information that will carry along with your preparer name to the Acceptance Agent portion of the W-7

Blog posted 03/07/2018

Pro Online 2017: Acceptance Agent for W-7 Phase I

02 Mar 18
Kim Manuel

No Comments

We have released Phase I of having the ability to print the Certified Acceptance Agent information on the bottom of Form W-7 when applying for or renewing ITIN applications.

Navigate to the Preparer(s) menu in configuration

Edit an existing Preparer or Create a new one

There is a new section located between the Personal Information Section and Login Account Section

This is where you enter the information that will carry along with your preparer name to the Acceptance Agent portion of the W-7

Note: For EIN to carry to W-7, it needs to be entered in ERO Setup within Configuration

Phase II is scheduled to be delivered next week

Phase II is actually carrying the data to this section which is scheduled for the week of March 5th